How to use Nephroseq 5
STEP 1: Search for Gene
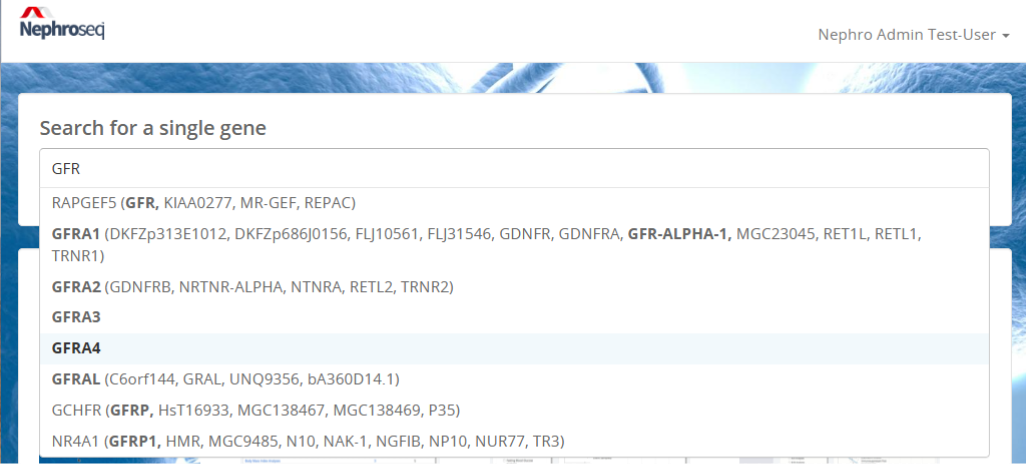
Start by searching for your gene of interest:
STEP 2: Search for Analyses
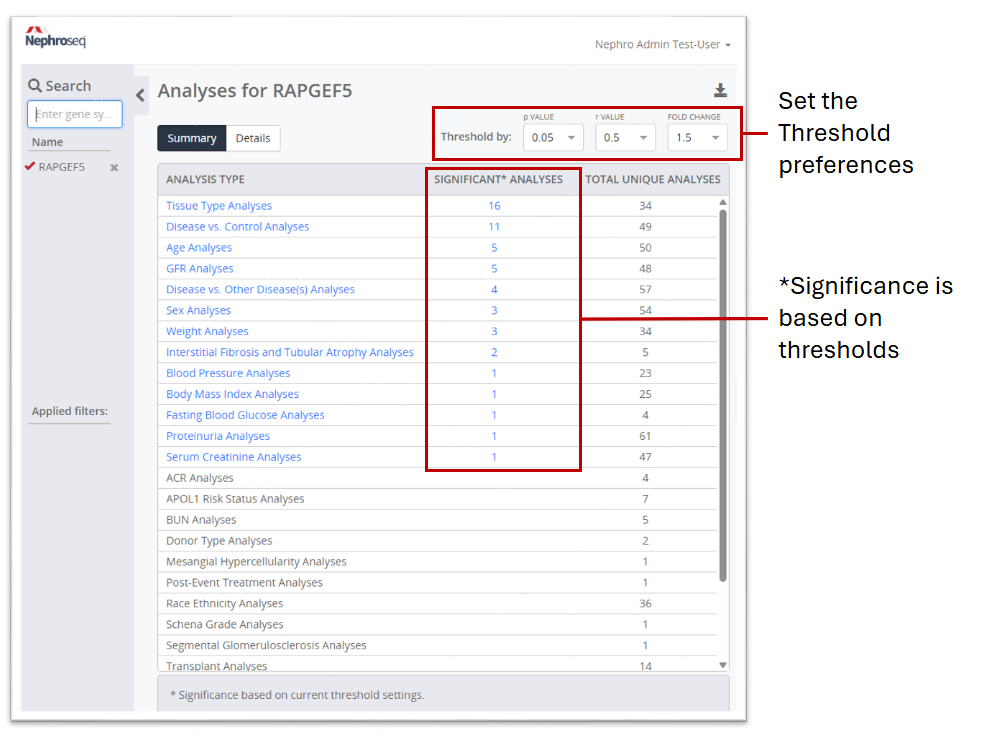
After you have selected your gene of interest, a summary list of analysis types will appear. If you select an analysis type, you are then taken to a page showing all significant* analyses and results for that analysis type. You may change the analysis type or choose additional analysis types in the filter menu.
* Significance based on current threshold settings
STEP 3: Refine your filters
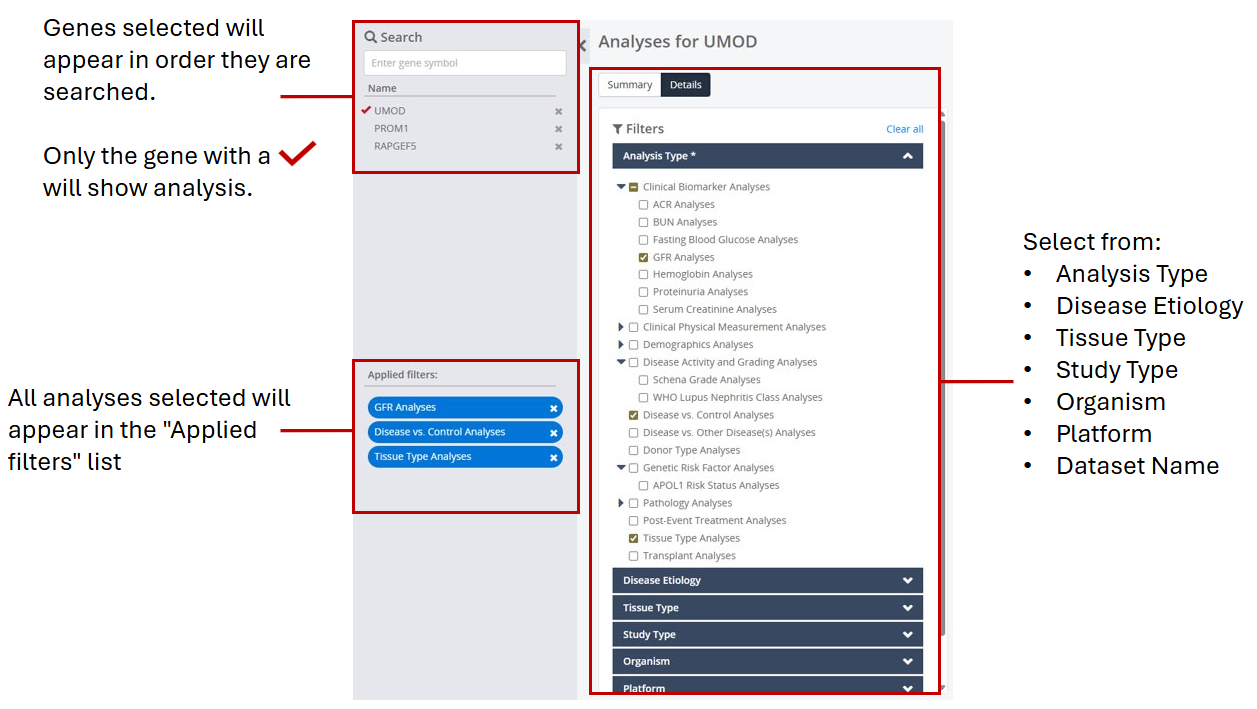
Your gene(s) of interest will be shown in the upper left with the currently active gene shown with a red check mark. You may search for additional genes to filter on and you may change the currently active gene by clicking on the gene symbol.
As you select filters, your selections appear in the Applied Filters list in the lower left corner and can be removed by clicking the X.
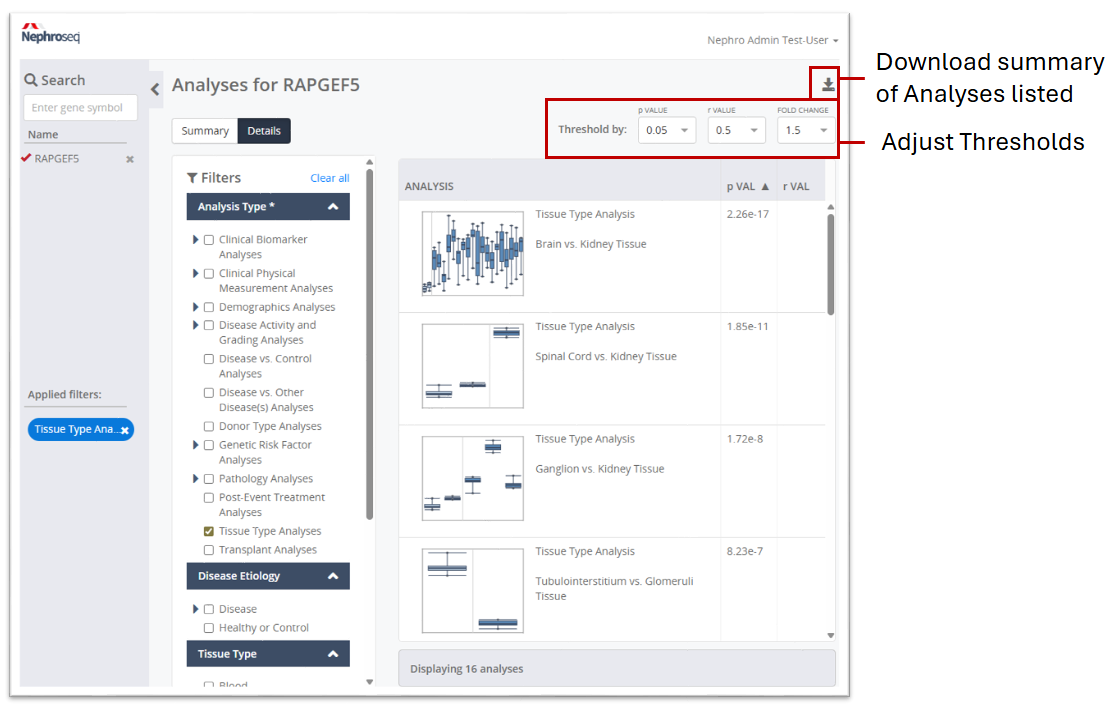
Adjust the thresholds of analyses displayed in the table by changing the p VALUE, r VALUE, and/or FOLD CHANGE drop-down menus in the upper right. Columns can be sorted by clicking the column header.
Once you have filtered to the analyses of interest, you can download a CSV with the full set of results displayed in the table.
STEP 4: Drill in for the details
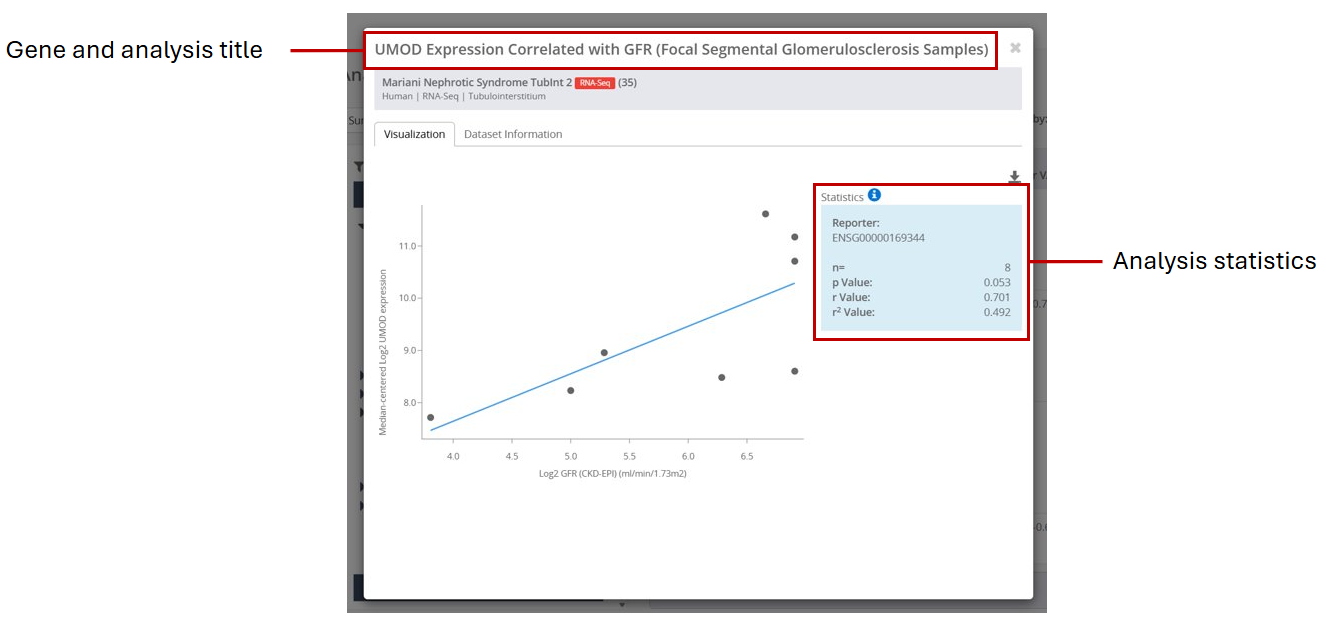
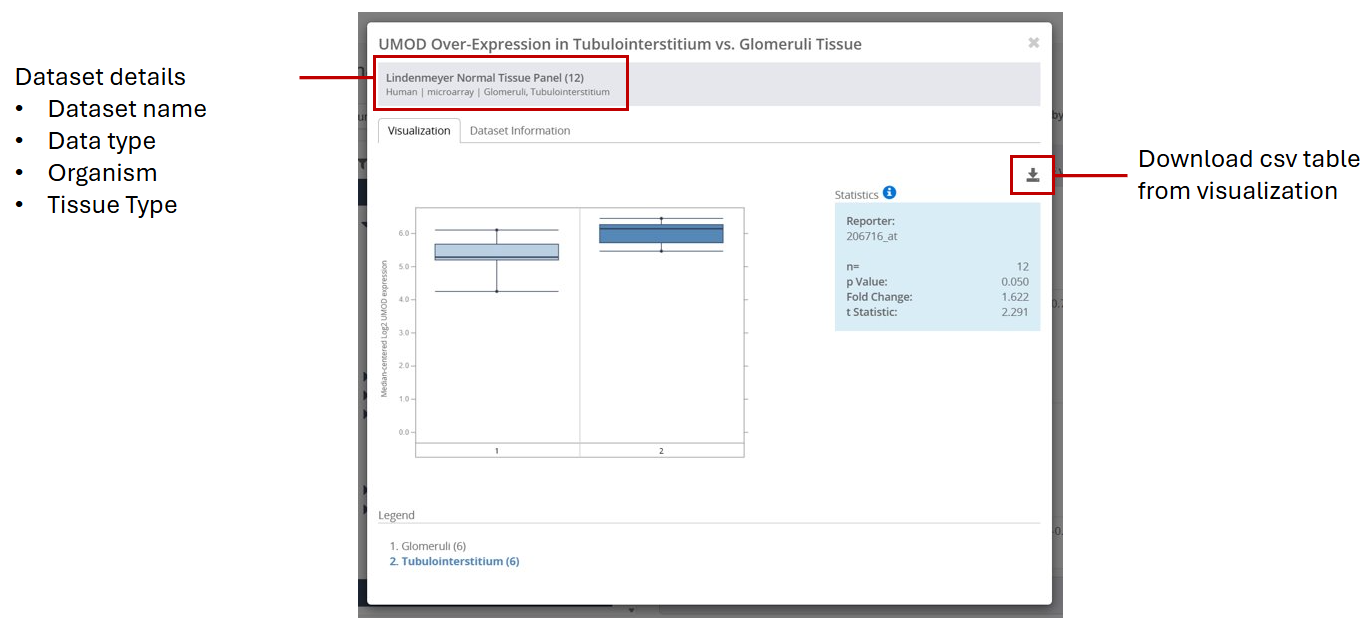
Review the individual sets of analyses available based on your filters and click on any to view additional details such as gene expression and dataset information.